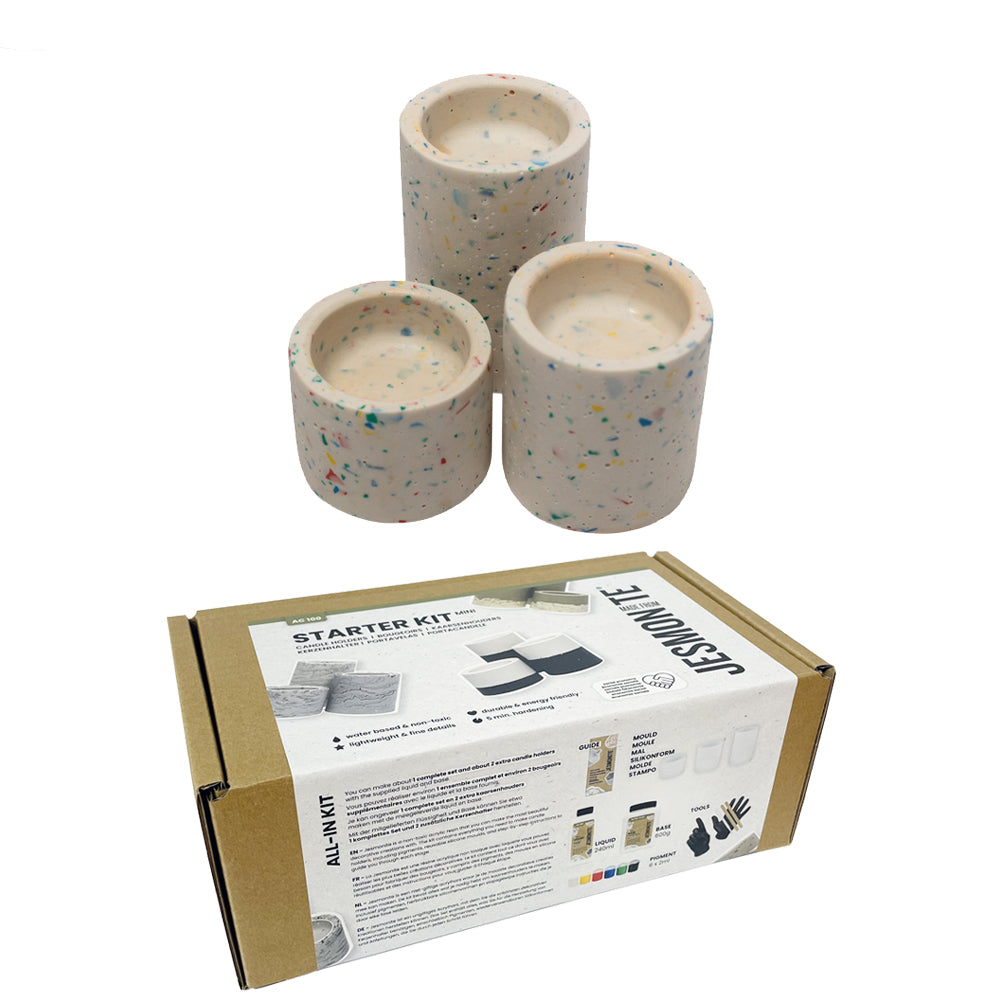
Jesmonite Starter Set: Candle Holder
Kostenloser Versand
ab 150€ in DE
Bequem und sicher zahlen
mit Klarna und PayPal
Jesmonite is a water-based composite material used in fine arts, crafts, and construction. It is made of a gypsum-based material and an eco-resin.
Jesmonite AC100 is considered durable, fireproof and very robust . It can be used to make small and large objects. When mixed it absorbs color pigments and color powder very well. It is also considered a very safe working material as it does not contain any harmful chemicals and therefore does not emit toxic fumes.
Unlike Keraflott, which is mixed with water, the Jesmonite base/powder is only mixed with the Jesmonite liquid. This is the only way it achieves its unique properties, such as excellent color absorption and reproduction , as well as extremely fast curing (approx. 30 minutes).
Since the liquid Jesmonite mixture hardens very quickly, desired color pigments or powders should be added quickly.
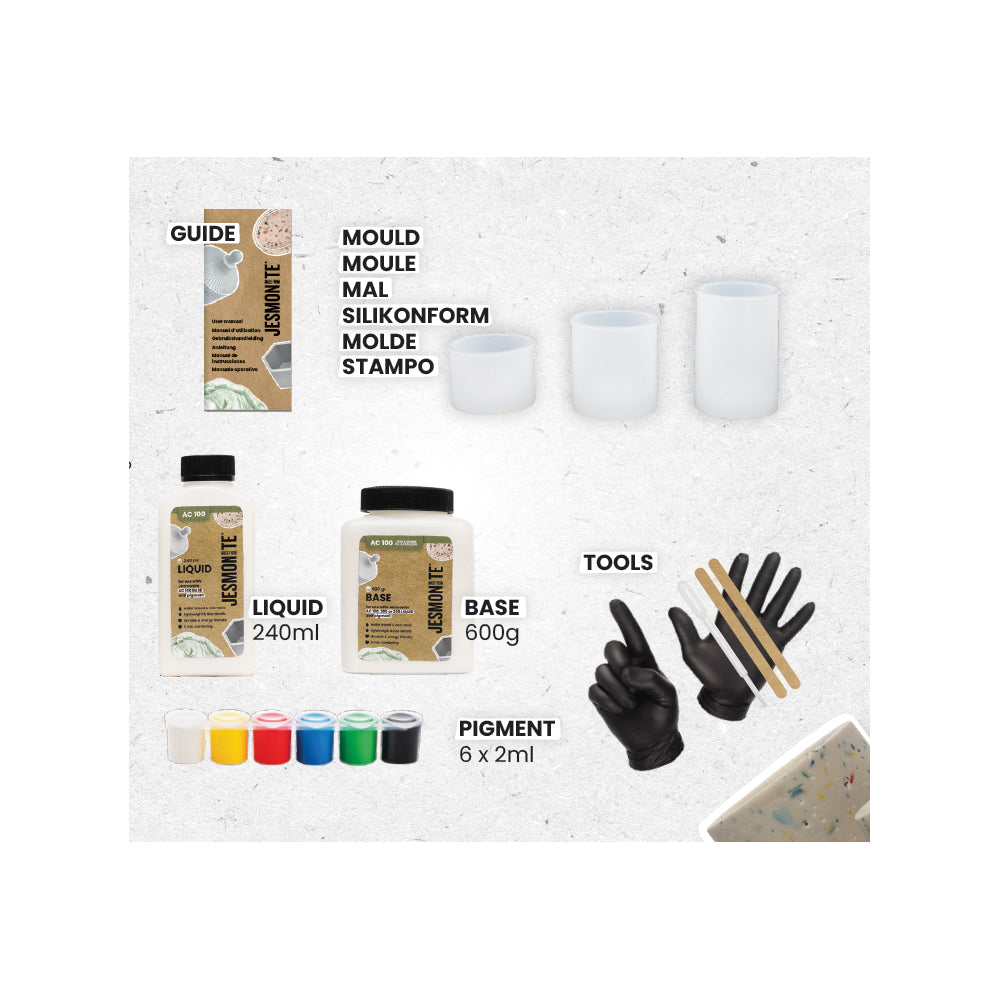
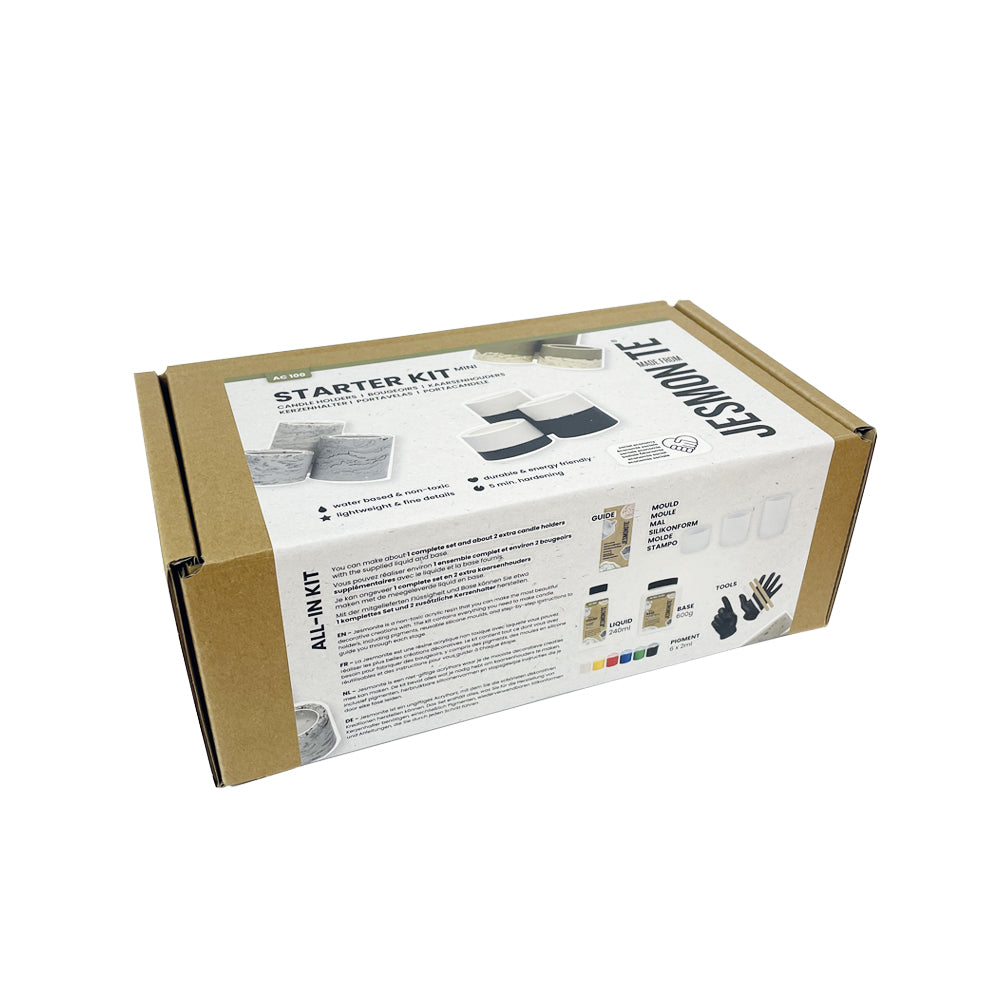
The “Candle Holder” starter set contains the following products:
- 240ml Liquid Jesmonite AC100
- 600g base/powder Jesmonite AC100
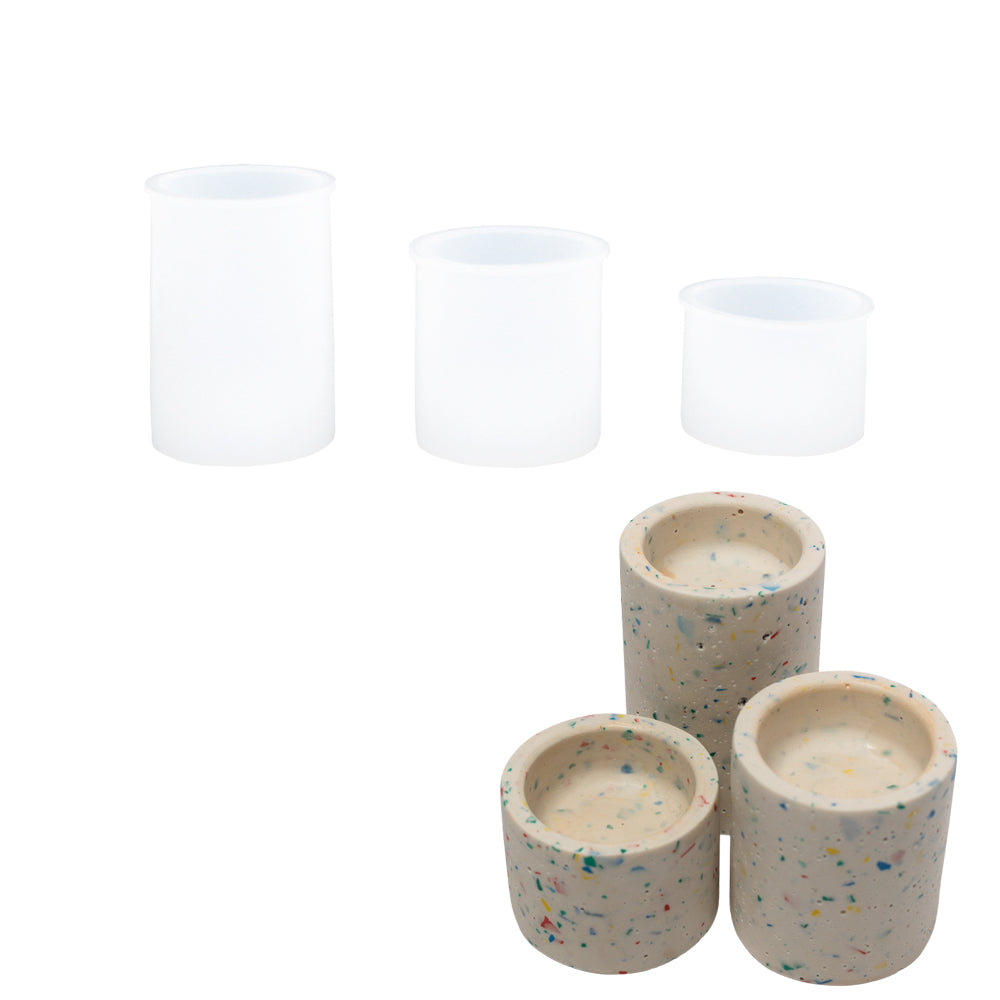
- Silicone mold(s): 3x different sized candle holders/tealight holders
- Jesmonite Pigment: 6x2g Multiset Strip - Classic
- Instructions in German, English, Dutch, French, Spanish and Italian
- Useful tools such as gloves, pipette, two stirring sticks
With the materials included in this set you can make approximately 1 complete set + 2 additional candle holders.
That's how it works:
Jesmonite is mixed 1:2.5 - ie 100ml liquid is mixed with 250g base/powder. Stir well to avoid lumps. If the mixture is liquid and free of lumps, you can add color pigments , rhinestones or terrazzo flakes as desired and desired. Then pour the mixture into the desired, clean mold.
To avoid unsightly air bubbles, we recommend placing the mold on a vibration plate so that all unwanted air bubbles can escape. This gives you a nice and even surface.
Then the shape of the Take the vibration plate and let it harden for about 30 minutes without any further movements. Once the liquid has hardened, you can remove your sculpture from the mold.
If necessary, unevenness can now be removed, for example through Rhinestones or If terrazzo flakes can form, repair or smooth them using fine sandpaper (180 grit).
Last but not least, remove fine dust from the sculpture and, depending on the application, with a Seal provided. This avoids greasing candle containers or vases with oil or water, which can otherwise leave unsightly stains.
Voilà - your desired sculpture is ready! 🎉
The starter set in use
Check out this post on InstagramA post shared by Hansawax.de | Waxes, wicks, colors, scents and much more (@hansawax)
Packaging
Packaging
Our candle wicks , candle dyes and dried flowers come to you in a recyclable and environmentally friendly paper bag.
The fragrance oils are bottled in a brown bottle that protects against external light influences and has little to no negative influence on the scent.
Our candle waxes also come to you in a recyclable and environmentally friendly paper bag. These can be quickly and easily reclosed using the clip provided.
From 20Kg+ the candle wax is delivered in the manufacturer's box. Please understand that we have no direct influence on the packaging materials used.
Share
You support a young startup
We are Rouven and Fabian, the founders of Hansawax. In 2021, we decided to make high-quality and sustainable candle materials available to everyone who pursues the hobby of candle making. Without exception, our products should be compatible with each other and easy to use. To date, we have continually developed our range so that you can get everything you need from us to make sustainable and beautiful candles.
-
Our idea
We only offer candle waxes from natural raw material sources and package them in 100% recyclable paper bags. We complement this with high-quality candle colors in flat bags made from corn starch and rich fragrance oils from German production in recycled brown bottles. By focusing on resource-saving packaging materials, we not only reduce waste and protect the environment, but also make an important contribution to sustainable trade.
-
Fast & cheap
We attach great importance to fair prices and fast shipping. Thanks to short supply chains from our producers in Germany and Europe, we can offer our products with a clear conscience. We source most of our products directly from production without intermediaries. This allows us to offer our range at fair prices. If we receive your order before 12 p.m., it will usually be packed and shipped the same day. Your package will often reach you the next day.
-
Hansawax guarantee
Compatibility, sustainability and quality are our top priority. Because we are only happy when our customers are satisfied. Many have been loyal to us since the beginning and we are very grateful for that. If you have any questions about our products or your order, you can reach us by email, using our contact form or the social media channels Instagram and Facebook. We are always happy when we can help you.
Our guides for your candles
Pouring the candle
We want you to achieve the best results when making your custom candles. And that's very easy! Here you will find a small step-by-step guide.
What you need:
- stove
- Melting container (melting pot or melting jar)
- Wax thermometer
- Mixing spoon
- Wick centerer
- if necessary a cooking apron
Step 1:
Take a saucepan filled with water and place the melting container in it. Put your rapeseed or soy wax pallets into the melting container - you determine the amount depending on the size of the candle you want to make. Now you heat the water. It's best to use a wax thermometer and pay attention to the flash point . You should stir the wax every now and then with a mixing spoon until everything has melted.
Step 2:
In the meantime, take a wick and center it upright in the candle jar using the wick centerer . Of course, you can also prepare this step beforehand.
Step 3:
Add the intended amount of the selected fragrance oil to the liquid candle wax and stir it a few more times.
Step 4:
Now pour the candle wax into your candle jar until it is filled. Now all you need to do is let the candle wax cool down.
Complete!
The proportion of fragrance oil to candle wax
Scented candles are something wonderful and create peace, serenity and relaxation. Of course, a balanced proportion must be observed when pouring and mixing the scented candles. We therefore recommend the following quantities of fragrance oils:
- For a mild scent: 4 to 6 g per 100 g of candle wax
- For a pleasant scent: 7 to 8 g of fragrance oil per 100 g of candle wax
- For an intense scent: 10 g of fragrance oil to 100 g of candle wax
We strongly advise against adding more than 10 g, as otherwise the candle will “sweat out” the fragrance oil and this can lead to significant impairments in the burning behavior.
Flash point of fragrance oils
The flash points (also called flash points) are always different depending on the fragrance oil. When the flash point is reached, important ingredients in the fragrance oil evaporate. This distorts the scent of the oil and significantly reduces the scent experience. We therefore recommend that you measure the candle wax using a candle wax thermometer observe and, if necessary, allow it to cool below the respective flash point.
Here you will find an overview of the flash points of all fragrance oils in our range:
- Raspberry Sorbet - 65°C
- Lemongrass Lavender - 77°C
- Frangipani - 77°C
- Cedarwood & Vanilla - 65°C
- Citronella - 53°C
- Salted Caramel Iced Coffee - 137°C
- Sandalwood - 65°C
- Patchouli Paradise - 122°C
- Honey & Milk - 99°C
- Matcha Tea Wild Honey - 100°C
- Coconut Bay - 72°C
- White Musk - 105°C
- Rose Jacarantha - 65°C
- Turkish Coffee - 65°C
- Cool - 85°C
- Black Lily - 85°C
- Pomegranate - 76°C
- Rosé Champagne - 85°C
- Gin Tonic - 74°C
- Cinnamon Cassia - 90°C
- Jamaican Rum - 93°C
- Christmas Cookies - 65°C
- Clean Cotton - 65°C
- Vanilla Bourbonesse - 75°C
Instructions for use of candles
• The visible wick should always be shortened to five to ten mm.
• Please keep the melted wax free of contamination.
• Please make sure that the candle burns for a maximum of four hours at a time.
• To avoid glass breakage, stop lighting the candle if there is approx. one to two cm of wax remaining.
• Be sure to avoid exposure to extreme temperatures.
• Please do not tilt or move the candles while the wax is liquid or the candle is burning.
• Smother the flame preferably with an extinguisher – blowing it out is not recommended.
• Please do not use any liquid to extinguish.
• The candle must not burn down without supervision.
TIP
To prevent the candle from burning in a tunnel shape, let the candle burn for at least one to two hours the first time you light it. The wax should be completely liquid on the surface. Have fun with your scented candle!
Troubleshooting
Bubble effect (bubbling effect)
Bubbles form in the wax, giving the candles a “spotty” appearance.
- The liquid candle wax was poured too hot in relation to the container/candle mold.
- The wax was agitated during the cooling process
- The candle wax may have been stirred/beaten too much while melting
-> Problem solution:
To avoid bubble formation, the liquid candle wax must be cooled down as much as possible so that it has a temperature as similar as possible to the candle container/mold. A good pouring temperature is, for example, 60-65°C - in this case the candle container/candle mold should be preheated to 50-60°C, for example in the oven. If possible, do not move the container/candle mold any more and ensure a room temperature of approx. 22-24°C - also avoid drafts and, above all, cold.
Tunneling Effect
The outside of the candle melts unevenly in relation to the inside of the scented candle
- The wick used is too small in relation to the size of the container: Please use a "larger" wick, see wick size information
-> Problem solving
Please do not dispose of the candles directly. You can melt the cast candle, for example, in a hot water bath or in the oven (if it is in a container) and reuse it directly for a candle with a larger wick. You can liquefy candle molds as usual in a bowl in a water bath.
Countersunk holes
Similar to the "bubble effect", "pits" or holes form on the surface of the candle.
- The wax was not heated to the correct temperature and/or poured at the appropriate temperature
- Or the wax was “disturbed” during the cooling process
- The candle wax was stirred too much
The scented candle or wick produces soot
- The wick may be too long - shorten it to a maximum of 1 cm
- The wick is “too large” in relation to the container
- Too many additives (fragrances, color, etc.) have been added. “Wrong” essential oils can also promote this.
The scented candle keeps going out:
- A wick that was too small in relation to the container was chosen
- Too many or incorrect color pigments have been added to the wax - too many pigments prevent the wick from burning.
Sooty fungus (mushrooming)
The wick curves and bends into the shape of a mushroom.
- A wick that was too large in relation to the container was chosen
The candle wax is broken or has cracks
- The candle was cooled too quickly.
-> Troubleshooting
Please leave the candle at room temperature (21°C) for at least 48 hours. Allow to harden - a temperature of 22 - 24°C is recommended. For a faster cooling process, please do not put the candle in the refrigerator, freezer or outside at low temperatures.
To repair cracks, you can use a hot hair dryer to melt the surface slightly.
The wax starts to burn in the melt
- Melting temperature too high:
Reduce the temperature of the water bath/pot to the recommended temperature (see wax instructions).
Congratulations, you now have a campfire and the fire department is probably (or hopefully?!) on the way!
The next time you try, we recommend reducing the temperature significantly. Please use a bowl placed in a water bath. This way you can ensure that the candle wax does not get hotter than 100°C (80°C is optimal). We recommend using a thermometer for this.
Irregular patches of color in the wax ( haze or spots)
- Too much or too little color pigment may have been added to the melted wax
- Color pigments in the liquid candle wax have not dissolved properly
-> Problem solving
Sometimes the melted candle wax looks as if all the color pigments have dissolved and the candle wax is ready to be poured. But that can be misleading. Undissolved pieces cause an unsightly haze when pouring - too few color pigments, on the other hand, cause unsightly stains because there is not enough pigment for the entire candle wax. We therefore recommend weighing the color pigments with a fine scale and giving them at least 5 minutes to liquefy in the liquid candle wax. This way you can ensure that your candle is the color you want.
Danger! More doesn't help in this case, but rather leads to the wick becoming clogged and the candle starting to soot. In addition, the candle only takes 48 hours. harden to its final color.
The color of the wax fades
- Basically every candle can fade in color. This usually happens through UV radiation. In industry, this is avoided by adding an additive (UV inhibitor).
-> Problem solving
To avoid fading, it is best to protect from UV rays and store in places protected from light.
Your problem wasn't listed here? Then please write us a message .